Android Platform Tools: Install ADB and Fastboot on Windows, Mac and Linux
Updated: September 26, 2026
Android SDK Platform-Tools provides ADB and Fastboot for communicating with Android devices from a computer. ADB handles tasks such as debugging, supported file transfers and reading logs. Fastboot communicates with supported bootloader or userspace flashing environments. Installing the package does not itself root a phone or make its bootloader unlockable.
Start by getting a reliable read-only connection. That separates cable, driver and authorization problems from the much more consequential question of which firmware or modification procedure is appropriate for the device.
ADB and Fastboot use different device states
| Tool | Typical connection | First check |
|---|---|---|
| ADB | Android running with debugging authorized, or a supported recovery mode | adb devices -l |
| Fastboot | A supported bootloader or fastbootd environment | fastboot devices |
A phone can appear in one list and not the other. That is not automatically an installation failure: check the phone’s current mode before reinstalling software. Some manufacturers use different flashing protocols, so do not assume every Android device exposes standard Fastboot.
The current package is centered on ADB and Fastboot. The earlier article incorrectly listed systrace as a current bundled utility; Google’s release notes record its removal. They list 37.0.1, July 2026 as the latest revision checked for this article, not the old 34.0.5 release. Official release notes.
Preparation
Use a computer you control, a proven USB data cable and an unlocked device that can display the debugging authorization prompt. A charging-only connection is not sufficient evidence that the cable supports data.
If Android Studio already manages your SDK, prefer that installation’s Platform-Tools. Multiple copies on the same computer can make troubleshooting confusing: the executable your terminal finds might not be the one you just updated.
For Windows, obtain the device manufacturer’s appropriate USB driver if needed. Qualcomm diagnostic/EDL and MediaTek service drivers are not interchangeable with the driver’s ADB interface. On Linux, device permissions or udev configuration may need attention even though there is no Windows-style installer. Google’s hardware-device setup guide covers platform setup.
Official downloads
Read Google’s Platform-Tools download page and terms before selecting the package for your computer. The stable links below deliver the current release and can change contents over time.
| Platform | Official archive |
|---|---|
| Windows | Platform-Tools for Windows |
| macOS | Platform-Tools for macOS |
| Linux | Platform-Tools for Linux |
Do not compare a downloaded archive with a checksum copied from an unrelated release. A locally calculated hash is only useful for authenticity checking when compared against a trusted value for that exact file.
Extract the package and check the executables
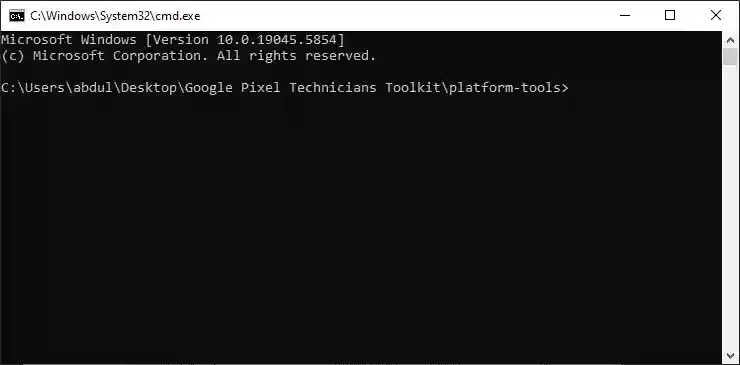
Extract the entire archive into a normal working folder. Keep the accompanying files together rather than copying only adb.exe. Open a terminal in the extracted platform-tools directory, not its parent or the ZIP preview.
In Windows PowerShell:
.\adb.exe version
.\fastboot.exe --version
In macOS or Linux:
./adb version
./fastboot --version
These commands check the local programs and do not require a connected phone. PowerShell needs the .\ current-folder prefix; simply typing adb can select a different copy on PATH or fail to find one. Once setup works, adding the folder to your user PATH is optional.
To check which PATH copy is selected, use Get-Command adb in PowerShell or command -v adb in a Unix shell. Do not edit shell startup files repeatedly while diagnosing a USB problem.
Enable debugging and authorize the computer
Open Developer options on the device and enable USB debugging. On many devices, Developer options is enabled by tapping Build number seven times, although the settings location varies by manufacturer.
Connect the phone, unlock its screen and review the computer’s authorization prompt. Approve only a computer you trust. Do not select permanent authorization on a shared public machine. Then run the following from the extracted folder:
.\adb.exe devices -lOn macOS/Linux, use ./adb devices -l. The examples in the remaining command table use the shorter adb form; use the prefix appropriate to your terminal when the folder is not on PATH.
Interpret the connection result
| Result | Meaning and next step |
|---|---|
Serial followed by device | An ADB transport is available; confirm it is the intended device. |
unauthorized | Check the phone’s debugging authorization prompt. |
offline | Reconnect, check the device state and investigate the ADB connection. |
| Empty list | Check cable, port, debugging, device mode and driver/permissions. |
| Multiple devices | Disconnect unrelated devices or explicitly select the intended serial. |
A serial number is device information: redact it before sharing logs publicly. For a stuck local ADB server, adb kill-server followed by adb start-server can restart that service, but it will interrupt other ADB sessions on the same computer.
Useful commands after connection
| Command | Purpose | Effect |
|---|---|---|
adb devices -l | List available ADB transports | Connection check |
adb shell getprop ro.build.fingerprint | Read the installed build fingerprint | Read-only |
adb shell pm list packages | List package identifiers | Read-only |
adb logcat | Inspect logs; stop with Ctrl+C | Logs may contain private data |
adb pull /sdcard/Download/example.txt . | Copy a known accessible file to the computer | Reads the device, writes a local file |
adb install app.apk | Install a trusted APK | Changes installed software |
adb reboot bootloader | Reboot into the supported bootloader mode | Interrupts normal device use |
fastboot devices | Check the Fastboot connection | Connection check |
fastboot reboot | Return from Fastboot toward normal boot | Reboots the device |
Do not interpret this table as a universal flashing recipe. Partitions, unlock commands and required modes vary by device. Follow a dedicated model/build-specific procedure for writes or bootloader changes. The Pixel bootloader guide is a separate topic, not an ADB installation step.
Wireless debugging
On supported Android 11-and-later devices, use the Wireless debugging pairing interface. The pairing address/port and the subsequent connection address/port can differ. Copy each from the appropriate screen rather than reusing one port for both operations.
Use a trusted network, pair the intended computer and disable wireless debugging when finished. If discovery fails, inspect the network and the connection address before changing firewall settings. Google’s ADB documentation describes pairing, device selection and troubleshooting.
Troubleshooting by layer
Command not found: first confirm that the extracted executable runs using its current-folder prefix. Fix PATH only after that works.
Phone only charges: test a known data cable and another direct USB port. Charging does not test the debugging interface.
ADB works, Fastboot waits: inspect the device in the actual required mode. On Windows, check the driver association in that mode; do not assume the Android-mode driver proves Fastboot is ready.
Linux permission error: review the distribution’s device-access configuration. Running everything as root is not a substitute for fixing permissions.
Flashing not allowed: this concerns device policy or state, not merely where ADB was extracted. Do not unlock or erase the phone just to “fix” an installation test.
Existing Pixel video example
The retained video demonstrates a Pixel recovery use case. Its device-specific firmware steps are not instructions for every phone that can run ADB.
Finish with a verified setup
A working setup means you know which executables are running, can identify the intended device and understand its connection state. Save the version and error output when requesting help. Once those basics are reliable, follow the specific guide for the operation you actually need.