How to Bypass FRP Using ADB Commands on Legacy Android Builds
Factory Reset Protection (FRP) is a fundamental security mechanism embedded into Android to protect stolen or misplaced hardware from being repurposed. Triggered whenever a device undergoes an unverified recovery wipe, FRP halts the initial setup wizard until the original Google account credentials associated with the device are verified against Google activation servers.
On some legacy, vendor-modified builds, an already-running and already-authorized ADB shell may permit setup-related settings to be changed. Android version alone is not a support matrix: the exact OEM build, patch level, adbd state, shell privilege, and prior RSA authorization determine whether a command can run. While this method uses official Google ADB binaries, the procedure is not a Google or OEM account-recovery method.
How the ADB Bypass Method Operates
The setup wizard on Android devices operates as an active system activity that monitors onboarding status flags. Specifically, the framework checks the secure table within the internal system settings provider for the entry user_setup_complete.
When a device is wiped outside the standard Settings menu, the operating system defaults this integer flag to 0. Until the setup wizard validates Google account credentials or completes all onboarding screens, the home screen launcher remains suppressed.
If the build permits the write, changing user_setup_complete to 1 may alter setup-wizard behavior. It does not remove the server/account association or prove that Factory Reset Protection has been cleared.
[!WARNING] Modern Android Security Constraint: On modern Android versions (Android 10 and especially 13+), writing to the
securesettings table or uninstalling system packages (pm uninstall) via a standard ADB shell ($) will fail with aSecurityExceptionorPermission Denied. These commands require a privileged root shell (#). This bypass technique relies on exploiting older firmware, finding a diagnostic backdoor that grants an immediate root shell, or utilizing specialized servicing tools that bypass these restrictions at the bootloader/EDL level.
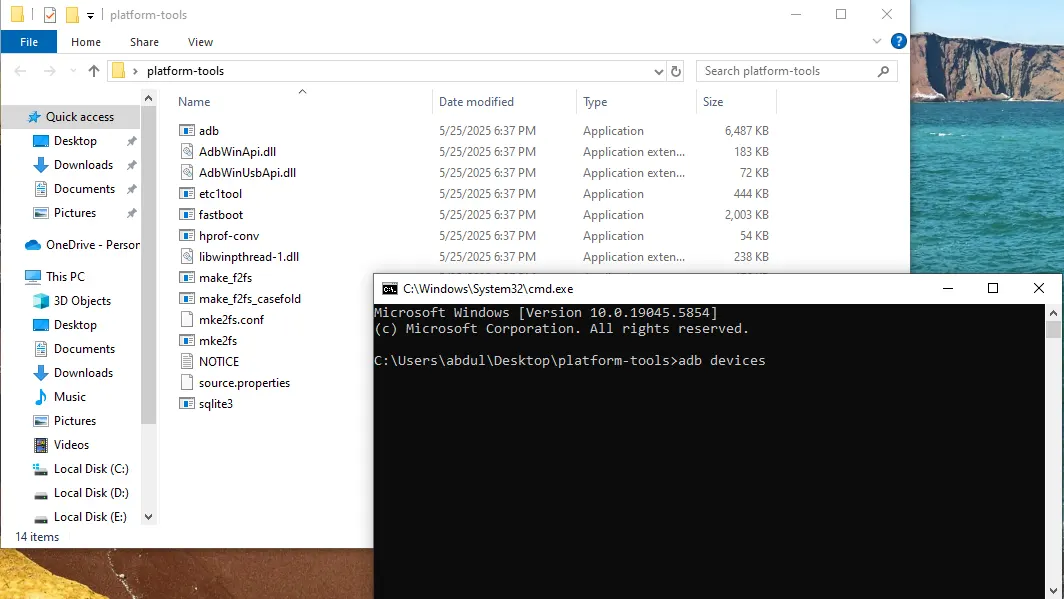
Android Platform Tools - ADB & Fastboot Binaries - GSM6.com
The Critical Prerequisite: USB Debugging Access
For any ADB command to reach the device, the Android Debug Bridge daemon (adbd) must be running, and the host computer’s RSA cryptographic key must be approved on the device display.
Because standard setup screens lock out developer options, technicians rely on OEM-specific diagnostic entrypoints to temporarily engage USB debugging:
| Manufacturer | Interface / Entrypoint Method | Operational Protocol |
|---|---|---|
| Samsung | Emergency dialer code *#0*# or *#0808# | USB test mode / MTP diagnostic handler |
| Transsion (Infinix, Tecno) | Engineer mode dialer *#*#3646633#*#* | Meta Mode / Diag serial communication |
Important Distinction: ADB authorization requires a fully booted Android system or a specific OEM test mode that exposes the adbd shell service. “Recovery ADB sideload” mode (found in stock Android recovery) is strictly for pushing signed OTA ZIP packages and does not provide an interactive shell to execute these database injection commands.
Without an active USB debugging connection or diagnostic handshake, raw ADB shell commands cannot interact with the phone.
Required Tools and Environment Setup
Ensure your workstation has the official Android command-line binaries and appropriate manufacturer USB drivers installed before proceeding.
| Tool | Purpose | Source Reference |
|---|---|---|
| Android SDK Platform-Tools | Official Google command-line utilities (adb, fastboot) | Platform Tools Setup |
| Samsung Android USB Drivers | Facilitates virtual serial communication on Samsung devices | Samsung Drivers Guide |
| Qualcomm USB Drivers | Bridges diagnostic endpoints on Snapdragon-based hardware | Qualcomm Drivers Guide |
Step-by-Step ADB Bypass Procedure
This is a diagnostic reproduction for a device that already exposes an authorized interactive shell. Do not proceed merely because recovery shows “ADB sideload.”
1. Set up Android Platform Tools on your computer
Download the latest Android SDK Platform-Tools package for your operating system (Windows, macOS, or Linux). Extract the ZIP archive to an accessible folder, such as C:\platform-tools. Open Command Prompt or PowerShell, navigate directly to that folder, and verify that the adb executable runs cleanly.
2. Enable USB debugging on the locked device
Power on the locked phone and stay on the welcome or language selection screen. If using a Samsung handset, tap Emergency Call, enter *#0*# to open the hardware test matrix, or trigger the manufacturer-specific diagnostic sequence. For other brands, utilize test point or recovery diagnostic options to expose the ADB port.
3. Establish and authorize ADB communication
Connect the phone to your computer using a certified USB-C or Micro-USB data cable. In your terminal, execute:
adb devicesInspect the terminal output. If the device ID displays as unauthorized, look at the smartphone display. An Allow USB debugging? prompt will appear with your computer’s RSA key fingerprint. Select Always allow from this computer and tap Allow. Running adb devices a second time should now show the status as device.
4. Execute the setup-complete database override
With communication confirmed, execute the content insertion command directly into the secure settings database:
adb shell content insert --uri content://settings/secure --bind name:s:user_setup_complete --bind value:s:1This instruction requests a secure-provider write. Record its exit status and read the value back; a blank line is not proof of a successful change. Many builds deny this operation.
5. Restart device activities and verify launcher access
To immediately engage the updated configuration, launch the primary system setup or account management activity via the Android Activity Manager:
adb shell am start -n com.google.android.gsf.login/If that activity is unavailable or returns an error on newer Android builds, launch the core Settings application:
adb shell am start -n com.android.settings/.SettingsIf the activity exists and the build allows it, the interface may open Settings or another activity. Treat this as temporary UI access until the legitimate owner completes supported account recovery. Rebooting into a launcher does not prove the persistent FRP state was cleared.
Practical Troubleshooting
- Device not listed in
adb devices: Recheck device manager for missing ADB Interface or Composite Device drivers. Reconnect using a USB 2.0 rear motherboard port. - Error:
Permission deniedon content insert: Indicates that the Android security patch on the device has restricted third-party shell writes tocontent://settings/secure. On these builds, OEM-specific service tools or official flashing workflows must be utilized. - Looping after reboot: If the device returns to the setup screen upon restart, the persistent FRP partition (
frporpersistent) remains marked. Setting setup-related flags via ADB only bypasses the launcher block; it does not erase the cryptographic account protection. You must sign into an active Google account through Settings before power-cycling.
Video Demonstration
Watch this recorded technician session demonstrating ADB communication checks and shell execution on an Android test device: