Archived bootra1n/checkra1n USB Guide and Compatibility Limits
Jailbreaking iOS hardware governed by the checkm8 exploit requires low-level USB bus manipulation that standard Windows host controller drivers routinely disrupt. Because Apple’s checkra1n utility was developed natively for macOS and Linux, Windows technicians historically faced substantial hurdles executing the necessary Device Firmware Upgrade (DFU) timing sequences.
The download retained by this page is named bootra1n-x86_64-0.10.2-20200526.iso. It is therefore an archived bootra1n image carrying checkra1n 0.10.2, not evidence of Checkn1x 1.1.7 or the latest checkra1n build. The third-party MediaFire host does not authenticate the image or its hash.
Architecture and Core Principles of Checkn1x
Bootable Linux images of this kind provide a small host environment for a bundled checkra1n binary. Exact kernel, driver, persistence, and bundled-version claims must be established from the image and a traceable release record, not inferred from its filename or screenshot.
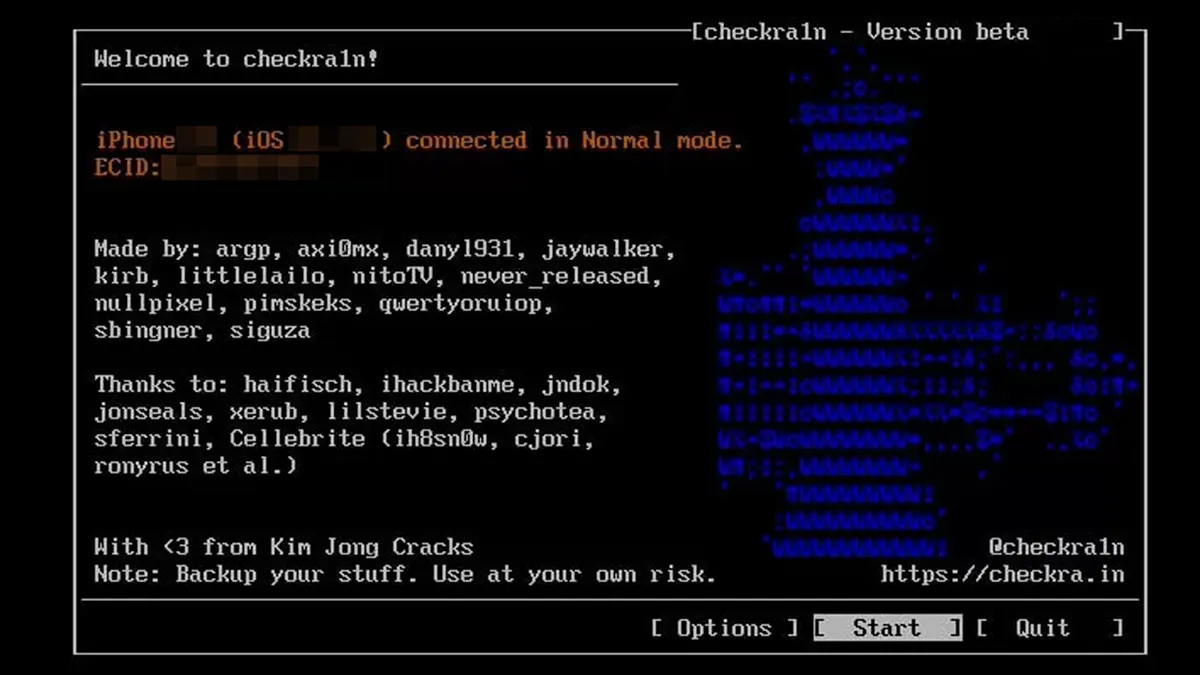
Checkn1x - Checkra1n USB Tool Interface
Key architectural characteristics include:
- Bootable environment: Writing the image destroys the selected USB drive’s existing contents. Whether it mounts or writes any host disk depends on the particular image and operator actions.
- Hardware-Level Exploit Carrier: Leverages the checkm8 bootrom vulnerability found in Apple’s Mask ROM, which cannot be patched through over-the-air iOS software updates.
- Semi-tethered behavior: After a reboot, jailbreak functionality is inactive until the supported boot procedure is repeated. Installed files or modifications do not necessarily disappear, so “factory stock” is inaccurate.
Device Compatibility and Hardware Scope
The checkm8 hardware boundary alone is not a release support list. This archived checkra1n 0.10.2 image must be checked against the upstream release’s documented devices and iOS versions; this article does not extend it to later iOS/iPadOS releases.
| Device Category | Models Supported | Silicon Architecture | iOS Firmware Scope |
|---|---|---|---|
| Archived image | bootra1n-x86_64-0.10.2-20200526.iso | Bundled checkra1n 0.10.2 is claimed by the filename | Verify against upstream 0.10.2 notes before use |
| Hardware ceiling | A7–A11-era devices may be checkm8-vulnerable | Vulnerability alone is insufficient | Exact device and OS support remain release-specific |
| Unsupported hardware | A12 and newer | Not vulnerable to checkm8 | This workflow does not apply |
Hardware Boundary: Devices powered by A12 Bionic chips and newer (iPhone XR, XS series, iPhone 11 through iPhone 16) include hardware-level mitigations against checkm8. Checkn1x cannot jailbreak these newer models.
Crucial Note on A11 Devices (iPhone 8 and iPhone X)
Do not use later-tool instructions to imply support in this 2020 image. A11 passcode/SEP restrictions and any “Skip A11 BPR” option depend on the exact jailbreak tool release and OS version. Back up the device, read the applicable upstream release notes, and stop if the exact combination is absent.
Required Tools and Distribution Files
Prepare a standard USB flash drive (1GB or larger) and the necessary disk imaging utility:
| Component | Function | Source Reference |
|---|---|---|
| Archived bootra1n ISO | Third-party hosted image named for bootra1n/checkra1n 0.10.2 | MediaFire archive (provenance unverified) |
| Rufus (Windows) | Utility for writing raw ISO images to USB drives | Official Rufus Portal |
| Balena Etcher | Cross-platform image flashing utility (macOS/Linux) | Balena Etcher Portal |
Step-by-Step Jailbreak Guide
Follow these numbered steps sequentially to create your bootable media and execute the jailbreak.
1. Obtain and authenticate the archived image
The file size alone cannot authenticate this image. Use it only if a trusted release record provides a matching cryptographic hash; this article does not currently provide one. Ensure you have a dedicated USB flash drive whose contents can be completely overwritten.
2. Flash the image to a USB drive using Rufus or Etcher
Launch Rufus on your Windows workstation:
- Select your USB drive under the Device dropdown.
- Click Select and browse to the downloaded Checkn1x ISO.
- Keep the Partition scheme as MBR and Target system as BIOS or UEFI.
- Click Start. If prompted for write mode, select Write in DD Image mode to preserve the hybrid ISO structure.
On macOS or Linux, launch Balena Etcher, select the ISO, target the USB device, and click Flash.
3. Configure BIOS and boot your PC into Checkn1x
Keep the USB drive inserted and restart your computer. Immediately press the manufacturer-specific boot selection key:
| Motherboard / PC Brand | Boot Menu Hotkey | BIOS / UEFI Setup Key |
|---|---|---|
| Dell | F12 | F2 |
| HP | F9 | F10 |
| Lenovo | F12 / Fn+F12 | F2 |
| ASUS | F8 | Del / F2 |
| Acer | F12 | Del / F2 |
| MSI | F11 | Del |
From the boot device menu, select the USB flash drive in a mode supported by the archived image. Boot behavior varies by firmware and hardware; do not disable unrelated platform security settings without documenting how they will be restored.
4. Put your iOS device into DFU mode
Connect your iPhone or iPad using an authentic Apple USB-A to Lightning cable (avoid USB-C to Lightning cables where possible, as host controllers occasionally fail DFU handshakes over Type-C).
Select Start in checkra1n and follow the on-screen timing prompts to trigger DFU mode:
- iPhone 6S and older: Press and hold Power + Home for 8 seconds, release Power, and continue holding Home for 5 seconds.
- iPhone 7 / 7 Plus: Press and hold Power + Volume Down for 8 seconds, release Power, and continue holding Volume Down for 5 seconds.
- iPhone 8 / iPhone X: Briefly tap Volume Up, tap Volume Down, hold Side Power until the screen goes black, then hold Side Power + Volume Down for 5 seconds before releasing Side Power.
5. Execute Checkra1n exploit and finalize package manager
Once DFU mode is detected, checkra1n automatically transmits the Stage 1 and Stage 2 checkm8 payloads. The device display will show the checkra1n verbose boot animation.
An All Done message reports the tool’s execution state, not device compatibility, data safety, account-lock removal, or a permanent result. Verify normal boot and the intended function. This procedure does not remove Activation Lock and no physical-device test was performed for this revision.