Flash an Eligible Pixel Build with Android Flash Tool
Google’s official browser-based Android Flash Tool provides a direct, reliable method to install factory firmware on Google Pixel smartphones without installing standalone command-line suites. Powered by the W3C WebUSB API standard in modern Chromium browsers (Google Chrome, Microsoft Edge, Brave, and Opera), the tool establishes an authenticated hardware communication channel between your web browser and the smartphone’s low-level bootloader.
The tool can install builds Google makes available for a supported device. It does not make every bootloop repairable, override an unavailable OEM-unlock toggle, or bypass anti-rollback and build eligibility rules.
Technical Architecture: WebUSB and Fastboot Automation
Prefer a Windows workflow with an already-downloaded factory package? Read the GSM6 Secure Flash alternative. Local firmware selection still requires internet access for GSM6 services. Install the official Google USB driver when Windows cannot detect the phone.
Traditional Android flashing requires manually downloading 3 GB factory image archives, extracting nested zip files, configuring command-line paths, and executing terminal scripts. The Android Flash Tool replaces this manual workflow by executing Fastboot commands directly over WebUSB.
| Operational Layer | Traditional Command Line (CLI) | Browser Android Flash Tool (WebUSB) |
|---|---|---|
| Prerequisites | Manual Android SDK Platform-Tools setup | Chromium browser with WebUSB support |
| Firmware Source | Manual image download from Google Developers | Streamed directly from official Google servers |
| Partition Write Sequence | Executed via local flash-all.bat or .sh | Automated browser-managed chunk transfer |
| Driver Interface | Windows WinUSB or Google Fastboot Driver | Native WebUSB device handle |
| Anti-Rollback Checks | User must read the exact build instructions | Tool eligibility checks apply, but the operator must still review Google’s device-specific warnings |
Critical Data Warning: Unlocking the bootloader and selecting the recommended “Wipe Device” option permanently erases all personal user data, photos, accounts, and application storage. Back up all vital files before initiating this procedure.
If you prefer offline flashing through local terminal commands, review our Android Platform Tools setup guide.
Prerequisites Before Beginning
Ensure your workstation and smartphone meet the required hardware baseline:
- Supported handset/build: Confirm the exact target currently offered by
flash.android.com; do not infer present support from this historical article. - Computer environment: Use a browser and host OS currently listed by Google for Android Flash Tool/WebUSB.
- USB Driver (Windows only): Official Google USB Driver installed in Device Manager.
- Connection Cable: High-quality USB Type-C data transfer cable connected directly to a motherboard USB port (avoid unpowered USB hubs).
- Internet Connection: High-speed broadband connection to stream 2.5 GB to 4.5 GB factory firmware images without interruptions.
Access the official portal at: Google Android Flash Tool (flash.android.com).
Step-by-Step Browser Flashing Procedure
1. Enable Developer Options, OEM Unlocking, and USB Debugging
Allow the host PC to communicate with low-level Android hardware interfaces.
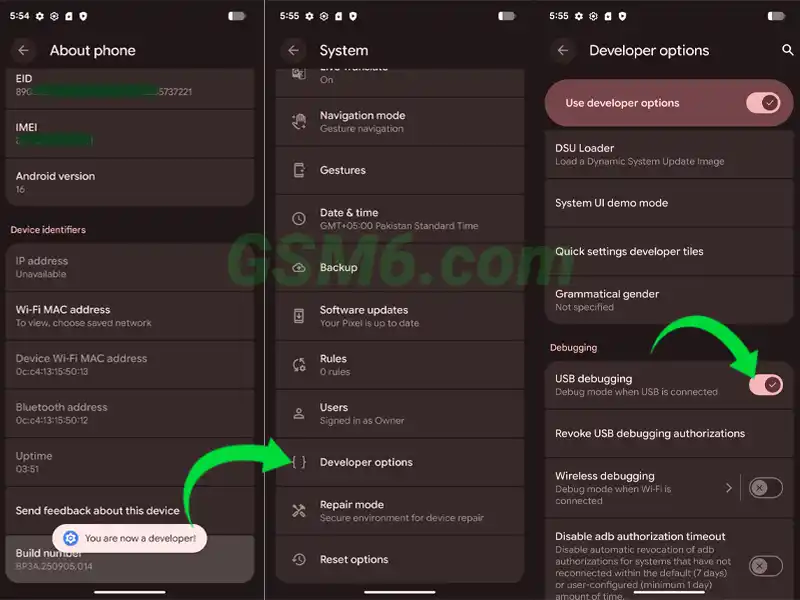
- On your Google Pixel, open Settings > About phone.
- Scroll to the bottom and tap Build number seven consecutive times until you see the confirmation prompt.
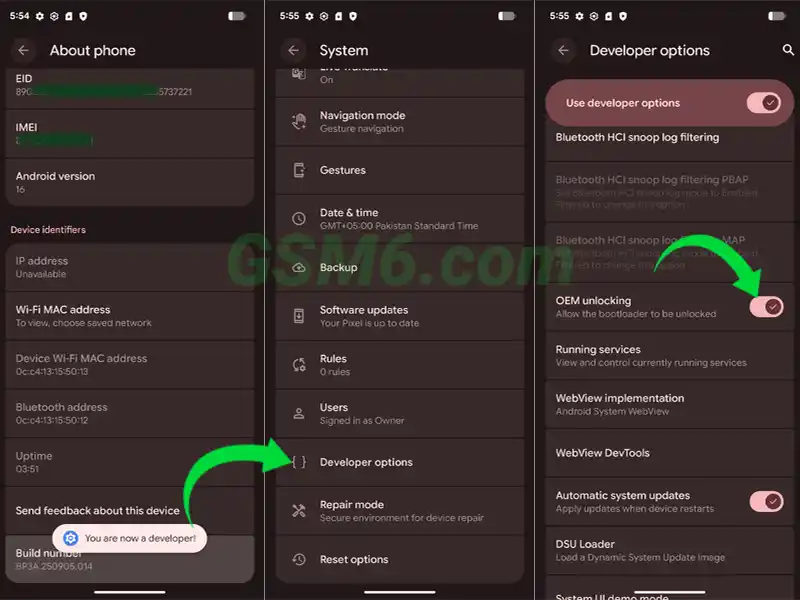
- Return to Settings > System > Developer options.
- Enable the toggle for OEM unlocking (enter your screen lock PIN if prompted).
- Enable the toggle for USB debugging.
2. Unlock the Pixel Bootloader in Fastboot Mode
Google Pixel security blocks partition flashing over USB unless the device bootloader is unlocked.
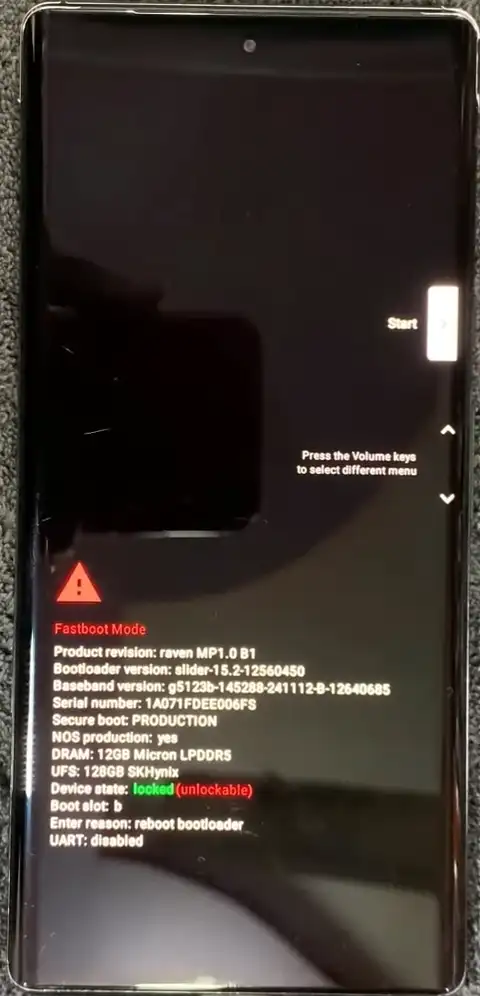
- Power off your Pixel handset completely.
- Hold Power + Volume Down until the Fastboot menu appears on the display.
- Connect the phone to your computer via USB-C.
- In your terminal, issue the unlock command:
fastboot flashing unlock
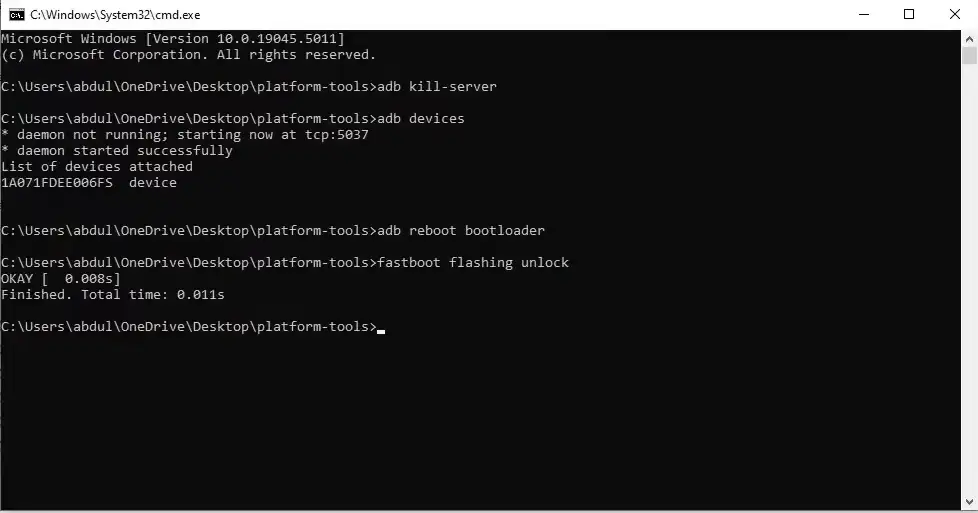
- Look at your phone display. Use the volume buttons to highlight Unlock the bootloader, then press the power button to confirm. The phone will perform a factory wipe.
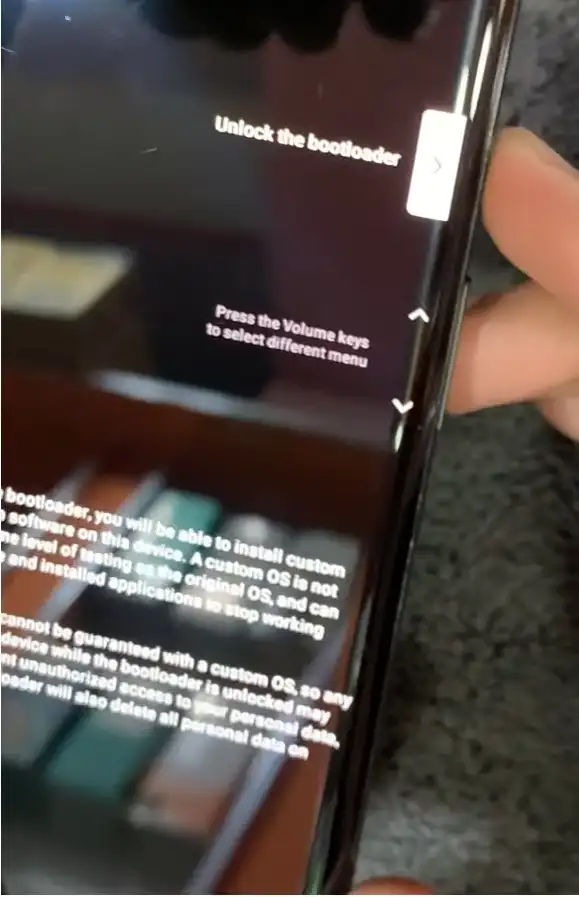
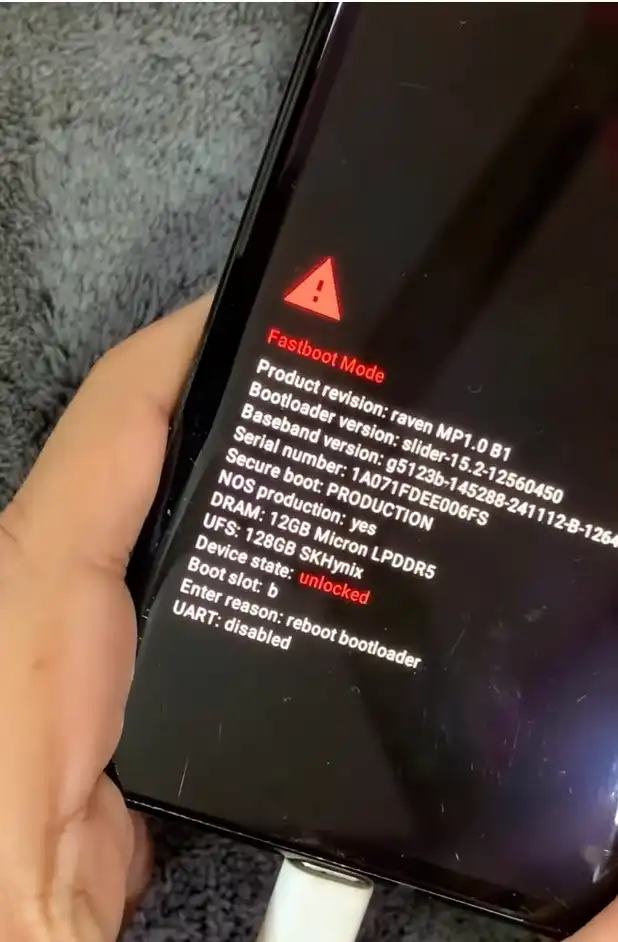
3. Connect to Official WebUSB Android Flash Tool
Establish the WebUSB bridge inside your Chromium web browser.
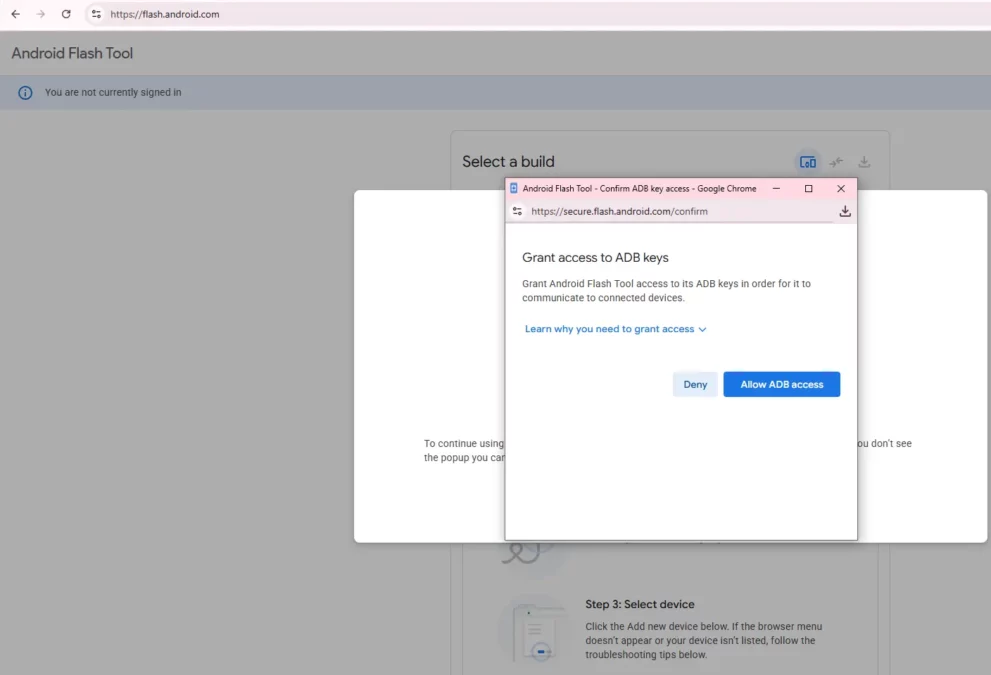
- Open Google Chrome or Microsoft Edge and navigate to
https://flash.android.com. - When prompted by the website, click Allow ADB access.
- Click Add new device.
- In the browser device picker popup, select your Google Pixel and click Connect.
- If the phone is booted into Android, check the handset screen and tap Always allow from this computer on the RSA debugging prompt.
4. Select Target Firmware Build and Configure Wipe Options
Configure build targets and partition options before flashing begins.
- Once connected, your Pixel model name and current software build will display in the tool window.
- Select your desired target build:
- Back to Public: Review the exact public build offered and its wipe/rollback notes.
- Available builds: Choose only a build the tool offers for this detected device.
- Click the pencil icon next to the selected build to inspect advanced settings:
- Wipe Device: Recommended (checked) to prevent application database corruption.
- Lock Bootloader: Use only after the complete selected stock build is installed and verified to boot.
- Force Flash All Partitions: This is a destructive recovery option, not a generic bug fix; use only when Google’s workflow recommends it.
5. Execute Browser Flashing and Complete Device Setup
Initiate automated partition downloading and flashing over WebUSB.
- Click Install build.
- Review the build confirmation dialog and click Confirm.
- Read and accept the Google Software License terms.
- The tool will download firmware images directly to the browser cache and stream them to your Pixel.
- During flashing, the phone will automatically reboot between Fastboot and Fastbootd modes. Do not touch the phone, disconnect the USB cable, or close the browser tab.
- If the browser reports success, verify the installed build, lock state, slot state, and ordinary functions. A success message does not prove the original hardware or modem fault was repaired.
Video Demonstration
Watch the complete browser flashing procedure demonstrated step by step:
Troubleshooting Common Flashing Errors
- Browser Device Picker Empty: On Windows, ensure you have installed the official Google USB Driver. If an ADB process is running locally in another terminal, run
adb kill-serverso the browser can claim the interface. - Flashing Fails at
fastbootdStage: Some USB 3.0 controller chipsets drop connection during the transition from Fastboot to dynamic Fastbootd. Reconnect via a USB 2.0 port or a passive USB 2.0 hub. - OEM Unlocking Grayed Out: Carrier-subsidized variants (such as Verizon models) enforce cryptographic bootloader restrictions. If the toggle remains grayed out after connecting to Wi-Fi, the device cannot be flashed via custom tools.
- Bootloop After Flashing: If the phone loops at the Google logo, reboot into recovery mode, select Wipe data/factory reset, and restart the device.