Unlock a Google Pixel Bootloader: Eligibility and Wipe Guide
Unlocking the bootloader on Google Pixel smartphones—including the Tensor-powered Pixel 6, 7, 8, 9, and Fold series—is the primary foundational requirement for firmware modification, custom kernel development, operating system debugging, and installing custom distributions like GrapheneOS, LineageOS, or CalyxOS. By default, Android devices ship with a cryptographically locked bootloader governed by Android Verified Boot (AVB). In this state, the bootloader validates cryptographic signatures across the boot, init_boot, vendor_boot, and system partitions before allowing execution to proceed.
This comprehensive guide covers the technical architecture of Google Pixel bootloader states, requirements for unlocking, carrier lock restrictions, and an operational step-by-step procedure using Fastboot.
Understanding Google Pixel Bootloader Security Architecture
On modern Pixel smartphones, the bootloader serves as the hardware-enforced root of trust:
- Android Verified Boot (AVB 2.0): During startup, the primary bootloader queries the Titan M2 security chip to verify that cryptographic hashes of all partition images match the public keys burned into the hardware keystore.
- Locked State: Only official Google-signed images are permitted to boot. Flashing commands targeting critical partitions are blocked.
- Unlocked State: The bootloader permits flashing custom partition images, booting custom kernels via
fastboot boot, and modifying system partitions. However, each startup displays the standard yellow warning screen alerting the user that the bootloader is unlocked.
Unlocking the bootloader irrevocably triggers an internal hardware data wipe. The encryption keys managed by the Titan security processor are discarded, erasing all user credentials, files, and applications.
Prerequisites and Important Warnings
Before initiating the unlock procedure, verify the following prerequisites:
- Full Data Backup: Ensure all personal photos, messages, contacts, and authentication apps are backed up to cloud storage or an external computer.
- Battery Capacity: Ensure the device is charged to at least 50% to prevent unexpected power interruption during partition formatting.
- Variant eligibility: The OEM-unlocking toggle depends on the exact sales variant, carrier policy, device-management state, and provisioning. A Fastboot command cannot override an unavailable toggle.
- Different locks: Bootloader unlocking does not carrier-unlock a SIM, remove Factory Reset Protection, sign out an account, or remove enterprise management.
- Computer and drivers: Install Android Platform Tools and Google’s current Windows USB driver when applicable.
Step-by-Step Procedure to Unlock Google Pixel Bootloader
Follow these five sequential stages to authorize, establish communication, and unlock your Pixel device.
1. Enable Developer Options and OEM Unlocking
Before the bootloader will accept unlock commands over USB, you must authorize bootloader modification within Android.
- Power on your Pixel and connect to an active Wi-Fi or cellular network (this allows the device to verify carrier provisioning with Google servers).
- Open Settings > About phone.
- Scroll to the bottom and tap Build number seven consecutive times until you see the confirmation prompt: “You are now a developer!”
- Return to Settings > System > Developer options.
- Locate the OEM unlocking toggle and switch it to On. Enter your device PIN or pattern to confirm.
- Scroll down and enable USB debugging to permit ADB device management.
2. Boot Pixel into Fastboot Mode
Fastboot Mode provides the low-level pre-boot environment required for sending bootloader partition instructions.
- Power off your Google Pixel completely.
- Press and hold the Volume Down button and the Power button simultaneously.
- Release both buttons when the Fastboot screen appears, displaying device specifications and the green Android robot.
- Note the device state line: on a factory device, it will display
DEVICE STATE - locked.
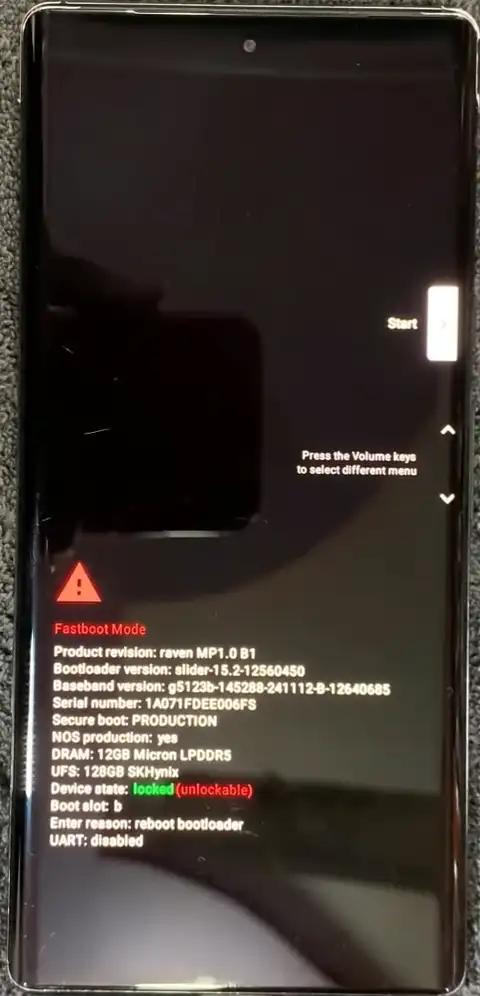
Google Pixel phone with locked bootloader in Fastboot Mode.
3. Verify Fastboot Device Communication
- Connect your Pixel to your computer using a verified USB-C data cable.
- Open a Command Prompt, PowerShell, or Terminal window in the directory where your
platform-toolsare installed. - Test Fastboot communication by executing:
fastboot devices - If communication is established, your terminal will display your phone’s unique hardware serial number followed by
fastboot. If the output is empty, inspect USB cable integrity and check Windows Device Manager for driver configuration.
4. Execute Fastboot Flashing Unlock Command
With device communication confirmed, dispatch the standard Android flashing unlock directive.
- In your terminal window, execute:
fastboot flashing unlock - The terminal will indicate that the command was sent and is awaiting user interaction on the device.
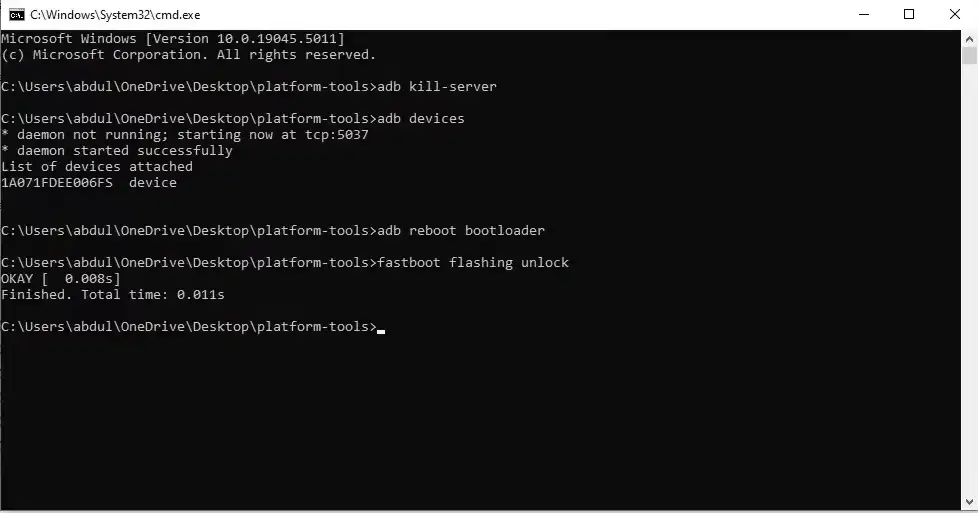
Executing fastboot flashing unlock command from platform-tools.
5. Confirm Bootloader Unlock on Hardware and Reboot
For security, Google requires physical confirmation via hardware buttons to prevent remote or malicious unlocking.
- Inspect your Pixel’s display. You will see a prominent warning screen with red text warning that unlocking the bootloader will erase all user data.
- Use the Volume Up or Volume Down buttons to highlight Unlock the bootloader.
- Press the Power button to confirm your selection.
- The device will format internal storage and reinitialize to the Fastboot Mode menu.
- Verify that the bottom state indicator now reads
DEVICE STATE - unlockedin red text. - Execute the reboot command in your terminal:
fastboot reboot - Your phone will reboot, display the standard unlocked bootloader warning screen, and boot into the fresh Android initial setup wizard.
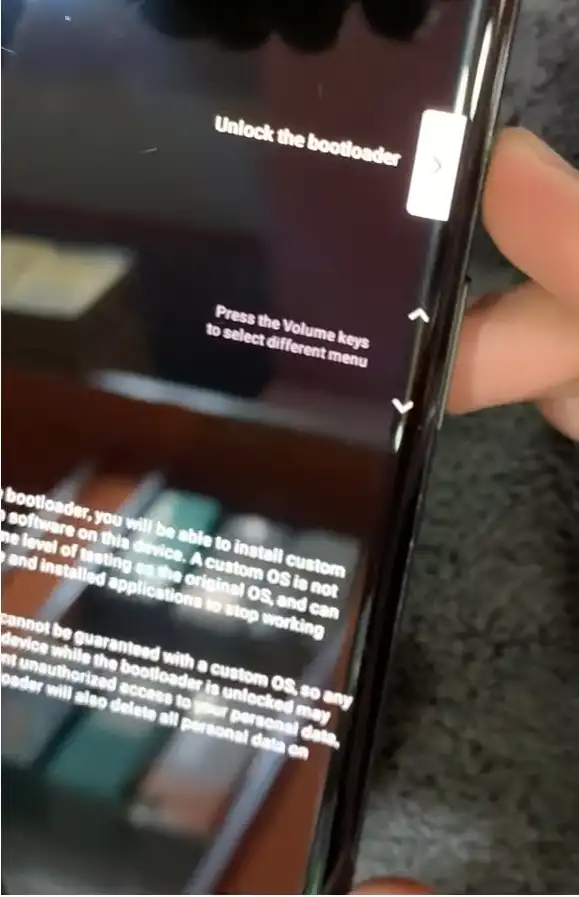
Confirming bootloader unlock using physical volume and power buttons.
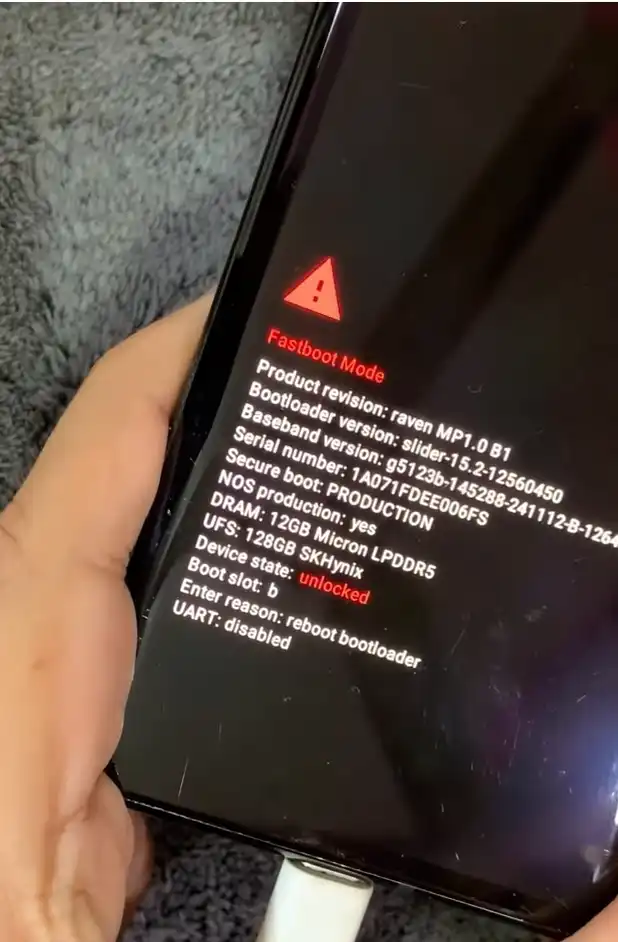
Google Pixel bootloader unlocked successfully displaying UNLOCKED status in Fastboot Mode.
Troubleshooting Fastboot Errors and Carrier Blocks
Error: FAILED (remote: ‘Flashing Unlock is not allowed’)
This error indicates that the OEM unlocking setting was not toggled on inside Developer options, or the setting reverted. Reboot into Android, connect to Wi-Fi, ensure OEM unlocking is switched on, and retry.
OEM Unlocking Toggle is Grayed Out
If the toggle cannot be engaged:
- Verify that the phone has an active internet connection so Google servers can validate device status.
- If the device is carrier-restricted or managed, consult the seller, carrier, or administrator. Do not describe every unavailable toggle as a permanent hardware restriction without exact variant evidence.
Fastboot Devices Command Hangs or Returns Blank
- Avoid front-panel USB hubs or unpowered splitters; connect directly to a rear motherboard USB port.
- Under Windows Device Manager, ensure the connected device is assigned the
Android Bootloader Interfacedriver rather than an unknown USB serial device.
Video Tutorial: Google Pixel Bootloader Unlocking
For an end-to-end visual walkthrough demonstrating the terminal commands and hardware button confirmation on a physical device, watch the video below:
Next Steps After Unlocking
An unlocked bootloader permits supported image operations, but each project has its own device/build requirements. Use the project’s official installation guide:
- Obtain root access via Magisk by patching the
init_boot(Pixel 7/8/9/Fold) orboot(Pixel 6) partition image. - Flash hardened security-focused operating systems such as GrapheneOS using their official WebUSB installer.
- Install custom community ROMs such as LineageOS.
To return to a locked state, first restore every required partition to complete matching official stock firmware, boot and verify the phone, and follow Google’s exact relock instructions. Relocking wipes data again and can make the device unbootable if modified or mismatched partitions remain.